
I had a nice challenge: calling a SOAP service from a WebAPI back-end application. To use the SOAP service, one has to authenticate with OAuth (Client Credentials Flow).
This article comes in 3 parts
- Calling a Secured SOAP Service from ASP.NET Core WebAPI (WSDL+ WCF) (This page)
- Securing a SOAP Client with OAuth2 in ASP.NET Core (WCF Behaviors)
- Integrating and Testing a Secured SOAP Client with Dependency Injection
You can find the companion code for this blog at GVerelst/ShiftLeftStore.
Introduction
Calling a SOAP service from an ASP.NET Core WebAPI project can feel like stepping back in time. WSDL files, XML envelopes, generated proxies — it’s a very different world compared to modern REST APIs. But with the right structure, you can integrate a SOAP backend cleanly, safely, and testably.
In this first part, we’ll explore the ShiftLeft Store SOAP API, generate a WCF client using dotnet-svcutil, build a clean product model, and write our first integration test.
In the second part, we’ll secure the client using OAuth2 and wrap everything in a robust DI setup. Before diving into the implementation details, let’s clarify who this guide is intended for and what readers can expect to gain.
You can find the companion code for this blog at GVerelst/ShiftLeftStore.
Audience
This guide is for .NET developers and software architects who need to integrate SOAP services into modern ASP.NET Core WebAPI projects, especially when bridging legacy systems with REST interfaces. Readers should be comfortable with C#, dependency injection, and basic HTTP concepts — no prior WCF experience required.
Overview of the ShiftLeft Store SOAP API

I will use the ShiftLeft Store API as a sample service. It is a publicly available SOAP service designed for testing and can be used with or without security.
Exploring the WSDL Using SoapUI (optional)
This step is not strictly necessary, but when I am going to use a service, I like to know how it behaves. Feel free to skip this section if you know all about SOAP.
In a REST service there is typically a swagger file that describes the functionality of the service. The equivalent in SOAP is a WSDL (Web Services Description Language) file. The WSDL describes the functionality in an XML format.
To explore the service, let’s use SoapUI, an open-source tool to test REST and SOAP services. After you have installed SoapUI, follow these steps to create the project:
File > New SOAP Project
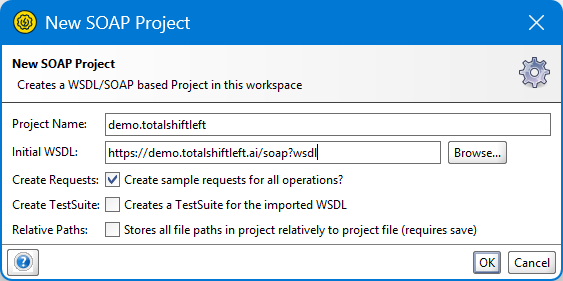
Set “Initial WSDL” to https://demo.totalshiftleft.ai/soap?wsdl. Notice the ?wsdl suffix which is a standard way to retrieve the WSDL from a SOAP service. The “Project Name” field will be automatically filled for you. Click OK and SoapUI will create your project.
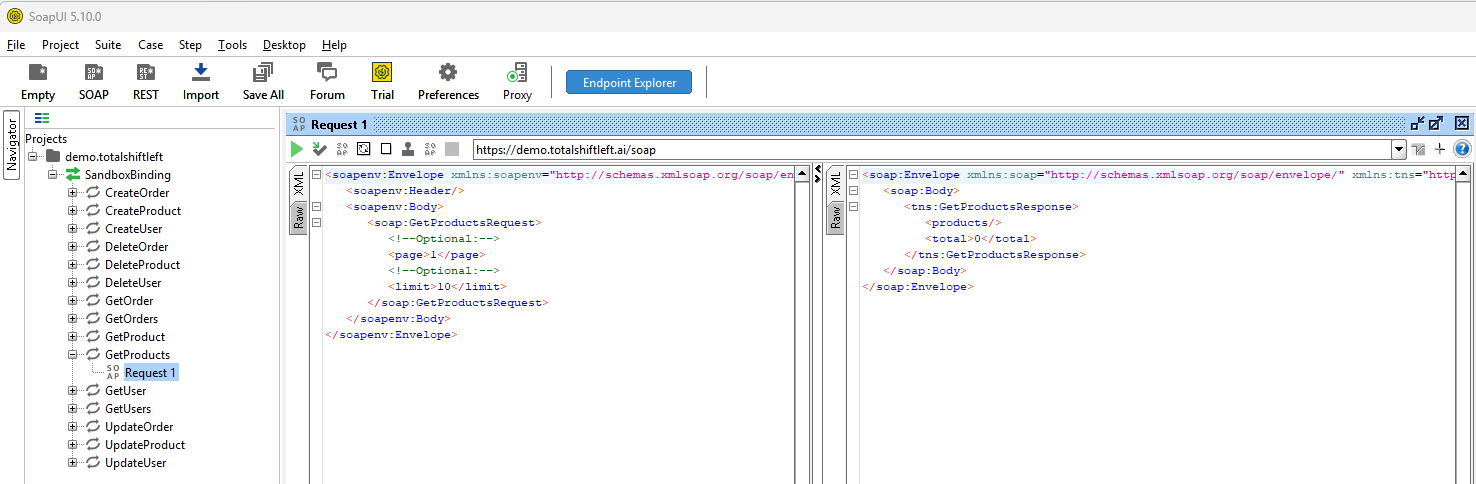
As you can see, all the messages are listed and SoapUI has created sample requests for each method. This allows you to test the service and see how it behaves.
Setting Up the ASP.NET Core WebAPI Project
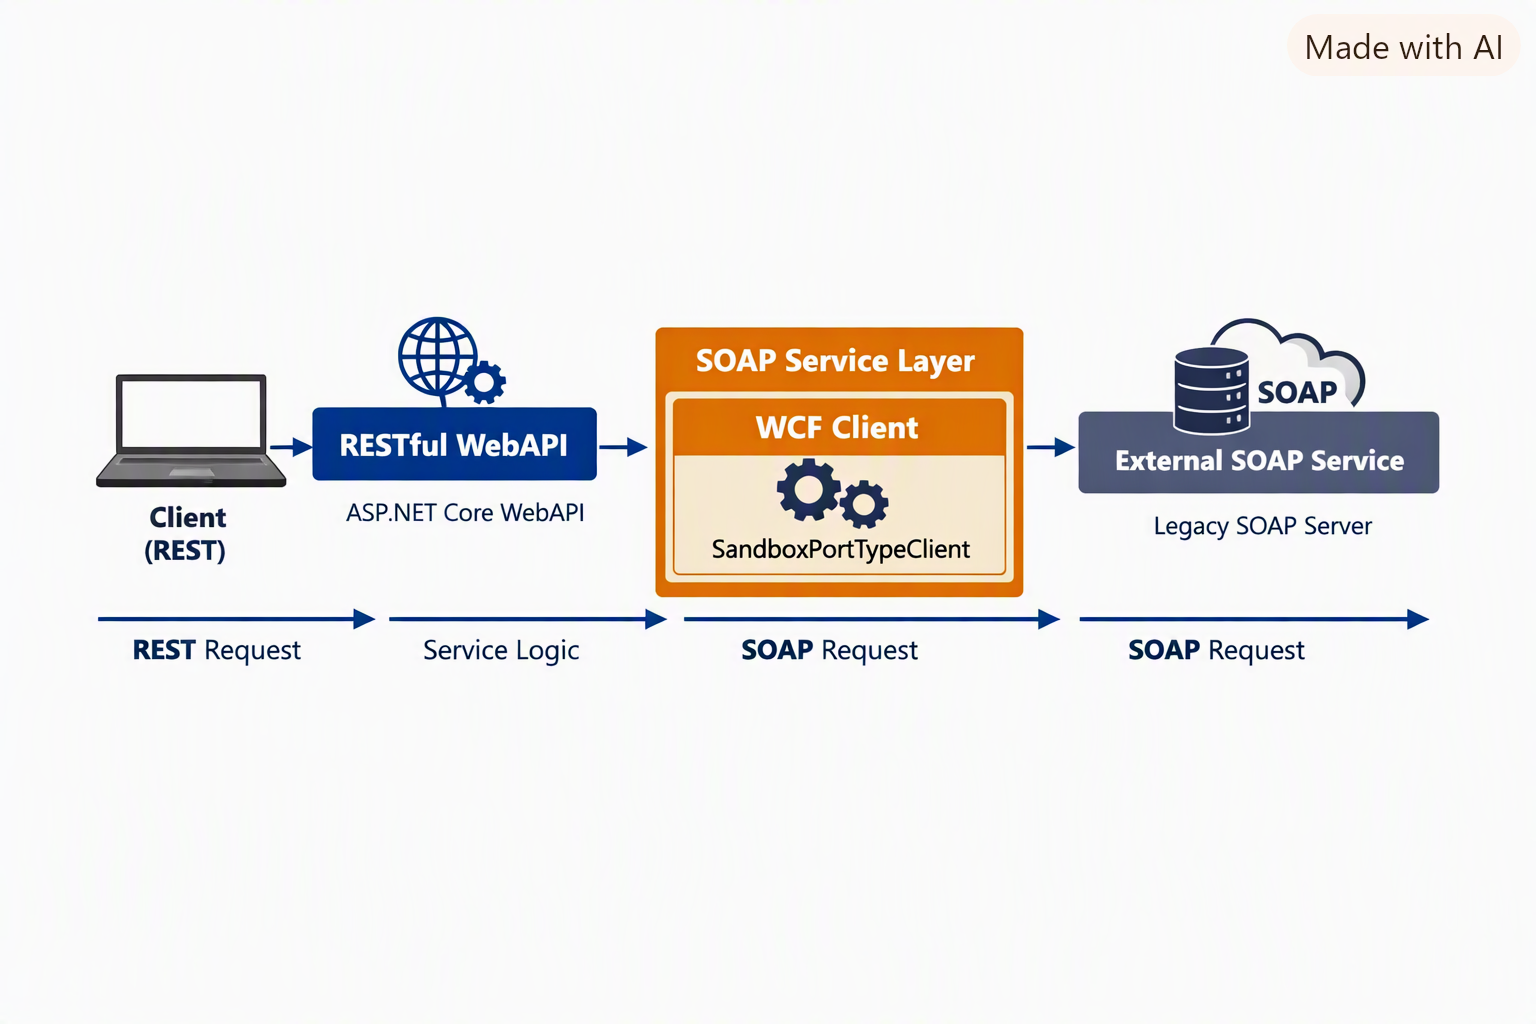
To set up the Web API solution:
- Open Visual Studio and create a new project
File > New > Project / Solution … - Choose ASP.NET Core Web API > Next
- Configure the project > Next
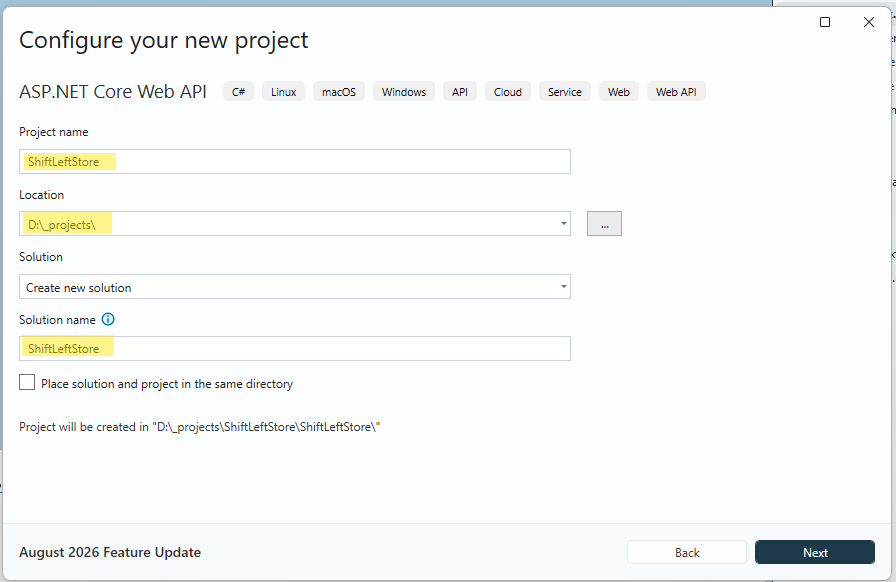
- Additional information : keep the default values > Create
You just created a new Web API. If you like to see the swagger file when you start the application here are some optional changes:
First add the Swashbuckle NuGet package to your project:
dotnet add package Swashbuckle.AspNetCore
Adapt Program.cs to show the swagger when running in a development environment. For security reasons you probably don’t want to show the swagger UI in production.
var builder = WebApplication.CreateBuilder(args);builder.Services.AddControllers();builder.Services.AddEndpointsApiExplorer();builder.Services.AddSwaggerGen();var app = builder.Build();// Configure the HTTP request pipeline.if (app.Environment.IsDevelopment()){ app.UseSwagger(); app.UseSwaggerUI(c => { c.SwaggerEndpoint("/swagger/v1/swagger.json", "ShiftLeftStore v1"); // c.RoutePrefix = ""; // uncomment to serve UI at root "/" });}app.UseHttpsRedirection();app.UseAuthorization();app.MapControllers();app.Run();
Changing the launch settings to open the swagger when starting the program
Find the launchSettings.json file under your project > Properties and set the following properties:
- “launchBrowser”: true,
- “launchUrl”: “/swagger”,
{ "profiles": { "http": { "commandName": "Project", "launchBrowser": true, "launchUrl": "/swagger", "environmentVariables": { "ASPNETCORE_ENVIRONMENT": "Development" }, "dotnetRunMessages": true, "applicationUrl": "http://localhost:5137" }, "https": { "commandName": "Project", "launchBrowser": true, "launchUrl": "swagger", "environmentVariables": { "ASPNETCORE_ENVIRONMENT": "Development" }, "dotnetRunMessages": true, "applicationUrl": "https://localhost:7137;http://localhost:5137" } }, "$schema": "https://json.schemastore.org/launchsettings.json"}
Start your application and see the nice swagger file popping up. Now we are ready to start exploring the SOAP project.
As an example, we will create a Products endpoint:
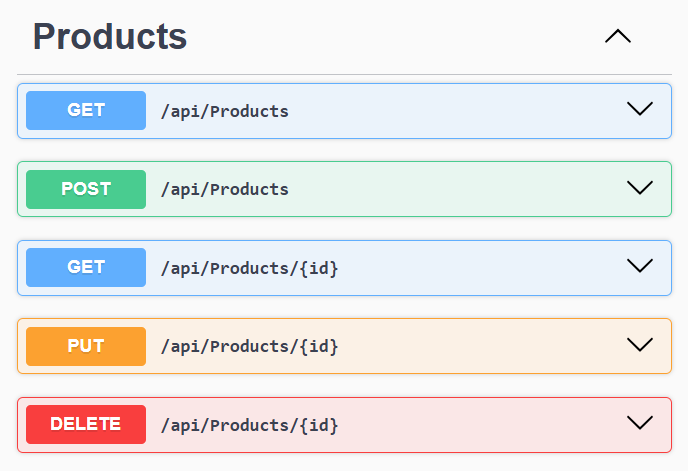
Calling the SOAP back end from our Web API project
To make the service reusable let’s add it as a library assembly. When this library is ready, all we need to do is to reference it from the Web API project, register the services and use it. This library will contain:
- the WCF proxy
- the SOAP service wrapper
- the product model
- future authentication logic
Here are the steps to add the class library to your solution:
- Right-click on the solution > Add a new project
- Choose “Class Library” > Next
- Name it “ShiftLeftStore.Soap” > Next > Create
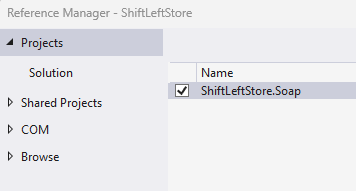
- Add a project reference to this project in the ShiftLeftStore project. In a real life environment the library would probably be stored as a NuGet package and referenced as such.
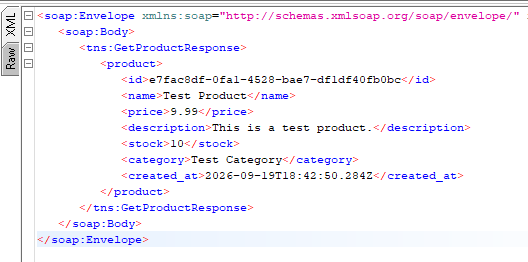
Looking at the response of the GetProduct response in SoapUI we can see the properties of a product:
Creating a Clean Product Model for Your WebAPI
SOAP DTOs are not ideal for exposing through REST. The Product record is part of the interface. This isolates SOAP‑specific types from the WebAPI surface.
- Right-click the ShiftLeftStore.Soap project > Add > New Folder > “Models”
- Add a new “Product” class under /Model
- Add the 6 properties. Id is optional because it is not used when creating a new product.
- Add a constructor to convert a ProductType to a Product.
- Add the ToCreateProductRequest and ToUpdateProductRequest methods to convert the Product record into a suitable Soap request.
Remark: you may want to write the constructor and the 2 methods outside of the class for maximum isolation, but I kept them here for code brevity.
using ShiftLeftStore.MySoap;namespace ShiftLeftStore.Soap.Models{ public record struct Product(string Name, decimal Price, string Description, int Stock, string Category, string? Id ) { internal Product(ProductType product) : this(product.name, product.price, product.description, product.stock, product.category, product.id) { } internal readonly CreateProductRequest ToCreateProductRequest() => new CreateProductRequest(Name, Price, Description, Stock, Category); internal readonly UpdateProductRequest ToUpdateProductRequest() => new UpdateProductRequest(Id, Name, Price, Description, Stock, Category); }}
As you see I’m using a record struct here instead of a class. Record structs are value types; although their fields can be mutable, they behave differently from record classes because assignments copy the entire struct.
See Classes, structs, and records – C# | Microsoft Learn to learn more.
Generating the WCF Client (dotnet-svcutil)
The WSDL file is an XML file that is barely human-readable, but very computer-readable. It is structured so there are tools to create all the necessary .NET classes to make it easy to use the service.
In the ShiftLeftStore.Soap add a new folder “Services” and create a class “ShiftLeftStoreService”. In this service we will call the SOAP service. Time to add it to the project. We will use the dotnet-svcutil tool.
Line 1 installs the tool, and on lines 5-7 we generate the code to call the SOAP service in the “Services” folder. Line 6 maps all generated types to the ShiftLeftStore.MySoap namespace, keeping SOAP DTOs isolated.
dotnet tool install --global dotnet-svcutilcd .\ShiftLeftStore.Soap\dotnet-svcutil https://demo.totalshiftleft.ai/soap?wsdl \ --namespace "*,ShiftLeftStore.MySoap" \ --outputDir ./Services
When we now look under Services there is a new file called “Reference.cs”. This file contains the proxy for the SOAP service and all the necessary DTO classes. Here is a basic way to use it.
For simplicity, this example instantiates the client inline. In production, inject the client via DI and manage its lifecycle.
public class ShiftLeftStoreService{ public async Task<Product> CreateProductAsync(Product product) { var client = new SandboxPortTypeClient(); SandboxPortType portType = client; CreateProductResponse response = await portType.CreateProductAsync(product.ToCreateProductRequest()); return new Product(response.product); }}
Smoke testing the code so far
We are going to test the call to the external service, so by definition we are going to write integration tests. Once this is in place we can improve the service. As long as the integration tests still are working, we are on the right track.
Right-click the solution > Add > New Project > xUnit Test Project
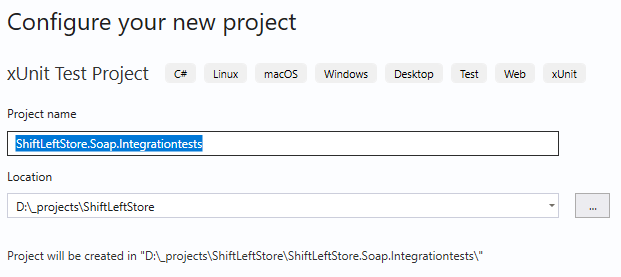
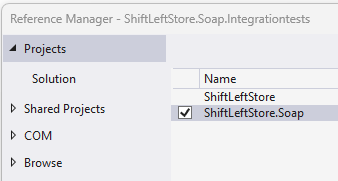
In the newly created project add a project reference to ShiftLeftStore.Soap and we are ready to create the first test.
Add a folder Services with a new class called ShiftLeftStoreServiceTests in it.
using ShiftLeftStore.Soap.Models;using ShiftLeftStore.Soap.Services;namespace ShiftLeftStore.Soap.Integrationtests.Services{ public class ShiftLeftStoreServiceTests { [Fact] public async Task CreateProduct_ShouldCreateProductSuccessfully() { // Arrange var service = new ShiftLeftStoreService(); Product product = new Product { Name = "Test Product", Price = 9.99m, Description = "This is a test product.", Stock = 10, Category = "Test Category" }; // Act Product result = await service.CreateProductAsync(product); // Assert Assert.Equal(product.Name, result.Name); Assert.Equal(product.Price, result.Price); Assert.Equal(product.Description, result.Description); Assert.Equal(product.Stock, result.Stock); Assert.Equal(product.Category, result.Category); } }}
Conclusion
At this point, you have:
- a clean WebAPI project
- a dedicated SOAP integration library
- a generated WCF client
- a clean product model
- a working integration test
This is the current solution explore view:
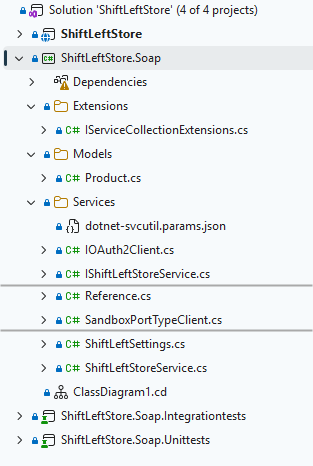
In the next article, we’ll secure the SOAP client using OAuth2, add a message inspector, configure endpoint behaviors, set up dependency injection, and expose the service through a REST controller.
References
What is Swagger | Swagger Docs
Basics of SOAP – Simple Object Access Protocol – GeeksforGeeks


Pingback: Securing a SOAP Client with OAuth2 in ASP.NET Core (WCF Behaviors) | MSDev.pro blog
Pingback: Integrating and Testing a Secured SOAP Client with Dependency Injection | MSDev.pro blog